Introduction
In this post we will look at adding a Wireless Access Point (WAP) to our pfSense box, and setting up a LAN (local area network). We’ll cover some theory on how LAN’s work including DHCP and ARP and also some background on wireless technologies associated with the 802.11 standard.
Let’s start with an introduction to LANs and how they are configured in pfSense to get a foundation.
LAN Networks
LAN stands for Local Area Network. A LAN is essentially all the devices connected to our home network, sitting behind the firewall/switch combo (sometimes called an appliance) and which are assigned an IP by the DHCP server in it.
Our current setup consists of the pfSense box and the laptop/PC we connected to it for configuring access to the Internet.
Within the pfSense box is some software known as a DHCP (Dynamic Host Configuration Protocol) server. This is responsible for handing out IP addresses to the machines that connect to the Ethernet network.
We’ll dig into each of these technology in more detail now.
Ethernet
The cables that plug into your PC and pfSense box are known as Ethernet cables.
Ethernet is a standard and family of technologies used for creating networks such as the LAN in your home. Over the years the technology has evolved from using 10BASE5 coax cable (similar to a cable TV provider uses) to the Cat5 and Cat6 family of cables (Cat7 now being available and currently Cat8 is being developed) .
Cat6 cables are the newer of the two technologies we are interested in and supports up to 10-Gigabit Ethernet (10GBASE-T). Cat5/Cat5e which are also commonly found support speeds of 100Mps and 1000Mps.
Depending on what your network hardware supports you can choose the corresponding cable for maximizing speed. In all likelihood you will have an Ethernet cable as provided with your ISPs modem. This you can use to hook up your pfSense appliance to the modem.
As we saw in the previous post our TCP/IP protocol stack has 5 layers. The Network layer of this stack is where Ethernet can be found. At this layer the IP datagram is packaged up as an Ethernet frame. At this point something called a MAC address is inserted into the header and the frame is passed to our network card (NIC) for transmission across the cabling (Cat5e, Cat6 etc.).
We’ll be covering a bit more about the MAC address next when we look at the DHCP server and ARP.
DHCP Server
On your pfSense box there is a service running called DHCP (Dynamic Host Configuration Protocol). You can access this from the main menu:

Under the Services drop-down. Here you will find an option called DHCP Server.
Click on this link. You should now see the DHCP server options for your LAN.

In the above screen shot we can see the DHCP server is enabled, this means that new machines connecting to the LAN will be dynamically assigned an IP address.
We can see next two values, those being the Subnet and the Subnet mask.
The Subnet(work) designates the subdivision of the network that our IP’s will be issued on. Using CIDR (Classless Inter-Domain Routing) notation we can specify the IP address assigned as the prefix, and then the range of IP’s available as hosts.
So for example 192.168.1.0/24 would be the CIDR notation of our current network. What this means in simple term is that all the IP’s will be prefixed with the 24 bits (192.168.1.0) and the hosts will be available in the remaining 8 bits (1 – 254). For example 192.168.1.10.
The value below this is called the Subnet mask. This is just another way of representing the /24 value.
When 255.255.255.0 is bitwise ‘AND’ with the IP address we get the routing prefix (192.168.1.0).
If you wish to change these values to a valid private IP address range you can use the subnet calculator to work out the values.
The final two fields tell us the range of IP’s we can allocate to hosts, and the selected range. For example we can allocate IP’s between 192.168.1.1 and 192.168.1.254, however for demonstration purposes I have set the range to only be between 192.168.1.100 and 192.168.1.199.
Therefore devices will only be allocated IP address dynamically between these two values.
If you have made changes to the values here, save them.
So what happens if we want to see which IP addresses are currently in use, and thus which machines on our network have an IP allocated to them?
Well pfSense provides a handy option under the Status > DHCP leases link.
This status report shows:
- IP address – The IP address assigned to your device e.g. 192.168.1.7
- MAC address – This is the hardware address of your device
- Hostname – Some devices will have a hostname configured e.g. raspberrypi or EvesMacBook
- Description – provides a description of the device if it exists
- Start – The start time and date of the DHCP lease
- End – The end time of the DHCP lease
- Online – Whether the device is online or not
- Lease type – If assigned by the DHCP server this will be active. If you assigned a static IP this will be static. More on this later!
So when a machine connects to the switch running pfSense, how does the DHCP server know how to assign an IP address and route packets to it?
That’s where the MAC address and ARP come in.
MAC address and ARP
The MAC (Media Access Control) is a unique 48 bit address assigned to your Network Interface Card (NIC) by the manufacturer. It will be in the format AB:CD:EF:12:34:56
The NIC operates at the Data Link Layer of the protocol stack and acts as an address on both wired and WiFI networks. Earlier we noted that the MAC address is inserted into the header of the Ethernet frame.
You’ll notice on the DHCP status page, your IP address is linked to your network cards MAC. How exactly does this work though? This is where ARP (Address Resolution Protocol) comes into play.
In pfSense click the Diagnostics drop-down and then select the ARP Table link.
You’ll the see screen presented shows similar information to that on the DHCP leases page.
The ARP protocol works by taking the IP address and translating it into the MAC. This allows for traffic to then be passed to the device in question.
First however a machine needs to register with the DHCP server to have a suitable IP addressed assigned to its MAC. It announces itself to the switch by sending a Discovery request. This request is sent out to the network at the IP layer with a destination IP address of 255.255.255.255 and with a source IP address of 0.0.0.0.
This request of course is packaged up as an Ethernet frame, so a source MAC is included with a network broadcast destination of FF:FF:FF:FF:FF:FF – (in essence this will be the same location as where the DHCP server is listening). Once the DHCP server receives the IP portion of the request, it will respond to the source MAC with an offer packet wrapped in an Ethernet frame.
Following this your machine requests a lease from the DHCP server, and subsequently the DHCP server acknowledges the release. Your machine is now associated with an IP address in the ARP table of the switch.
Thus other machines can send packets to the switch, which will in turn route them to your machine via the IP/MAC association.
When a client of the network wishes to update the ARP cache of other systems it sends out what is called a gratuitous ARP request. In this case both the source and destination IP address are that of the client. However the frame is send to the broadcast address, which you will remember is FF:FF:FF:FF:FF:FF. Thus the Ethernet frame is sent to all ports on the switch (pfSense in our case). No reply is expected however, and this is a useful feature.
Gratuitous ARP requests are handy for example when we wish to announce that a MAC address has moved physical ports on a switch. They can also help to debug IP collision conflicts. If a reply is received, then we know two devices are trying to use the same IP (for example two machines may have had their configuration hard coded to use the same IP address).
There are also some security risks inherent in Gratuitous ARP requests which will be looked at in later posts.
So this is a simplified overview if how your machine is assigned an IP address so it can communicate with other devices on the network.
Next we are going to hook up a Wireless Access Point so that we don’t have to rely upon the limited number of physical ports on our router.
Wireless Access Points (WAP)
A key component of an 802.11 wireless network (WLAN) is the access point (AP/WAP). The 802.11 standard supports two modes of operation. The first of these is known as infrastructure mode.
In this mode the network has at least one AP plus the clients that associate with it. This combination of clients and the AP is known as a Basic Service Set (BSS). It’s possible for us to have more than one AP runnings on the same WLAN. This can provide greater coverage for example. When we use more than one AP to create a single subnet, this is known as an Extended Service Set (ESS).
For the moment we will be dealing with the simpler of the two cases – the Basic Service Set.
The second mode, which we will not be dealing with in this post is Ad-hoc (aka peer-to-peer) mode. This allows for impromptu collections of wireless devices to communication with each other without using an AP. Typically this would be used if there was no need for these devices to require an onward connection to the Internet or local LAN. This set of devices is known as an Independent Basic Service Set (IBSS).
A wireless access point can also act as a DHCP server, handing out IP addresses like we saw with the pfSense appliance above or leverage the DHCP server running on pfSense itself.
For this tutorial we have going to use the DHCP server on pfSense. Later as we integrate VLANs into our home network it will become apparent why we wish to use pfSense offerings, rather than any built in features on our WAP.
My preferred brand of WiFi router/AP is Ubiquiti UniFI. In addition to AP’s they make a range of network gear that is perfect for home use.
Things to consider in an AP are the range. Typically you want to be within 100 meters of the AP. Antenna types also make a difference, with directional and omni directional devices being available. Those that are omni-directional should be placed towards the centre of the building. Later in this series of posts we will consider some of the risks associated with the WAP and range.
Many readers may want to repurpose old WAPs they have or may have done this already if they followed my article Raspberry Pi powered TV and dd-wrt router configuration.
If you go this route and are new to open source router software you may be interested in replacing the firmware with dd-wrt. At the dd-wrt website you will be able to find a list of router/AP models supported. This software unlocks many of the features on your AP that are often hidden by default firmware offered by the manufacturer.
Once you have AP ready, we are going to power it up. Don’t connect it to your pfSense switch just yet however.
Users of the UniFI will probably need to download the UniFI controller in order to administer their WAP. You can read me about the software and options here.
By default many WAPs will use an IP address in the 192.168.1.0 subnet. This will collide with the IP addresses issued by the DHCP server on pfSense (this is an example where the Gratuitous ARP request may see a reply).
We therefore need to disable the DHCP server on the AP before we can plug it into pfSense.
Your powered up WAP should now be broadcasting its SSID (Service Set ID), which will be visible on your machines list of wireless networks. The SSID is the informal name that you have applied to your network e.g. MyHomeLAN.
Each AP regularly broadcasts a beacon which acts as an advert for the AP and contains information about the service set and the amount of noise on the channel the AP broadcasts on.
Select the SSID and connect. Note if there is a password you need to apply this to connect. We’ll touch a bit more on passwords later when we configure the AP.
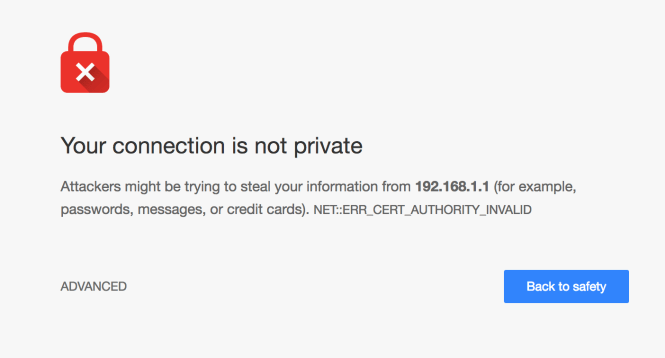
Next navigate to the IP address the WAPs web administration page runs on.
For example this may be : 192.168.1.1
Login into the web console using the default credentials. If you don’t know these, you can normally find them via Google. For dd-wrt users, check here. After you login, make sure to change the password from the default one, to something stronger.
For UniFI users, you will be able to connect to an associated AP via the controller.
Once logged in we will want to disable the DHCP server on the AP. The following guide provides comprehensive steps for this on dd-wrt:
https://www.dd-wrt.com/wiki/index.php/Wireless_Access_Point#Turn_Off_DHCP
The short universal version of this is for all WAPs is:
- Set the Local IP address to a valid IP from the range you configured in pfSense – for example 192.168.1.101. We are going to set this as a static IP pfSense.
- Set the subnet mask to be 255.255.255.0 – this is the same as we set in pfSense
- Disable the DHCP server. You may also need disable DNSmasq if it is enabled
- Set the Gateway to that of your router.
Save the changes. We can now power down the WAP and plug it into pfSense. Make sure you chose the LAN port and not WAN/Internet (which should be connected to your ISP modem). You can now power up the AP again.
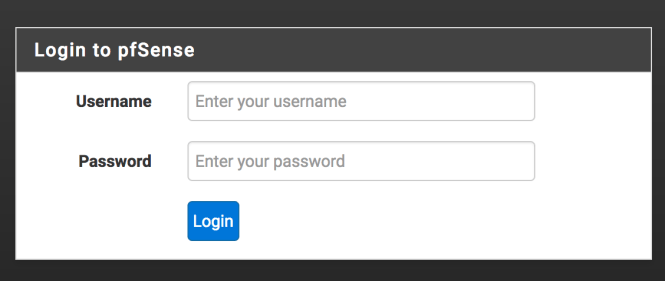
You should now see that your laptop/PC is assigned an IP address in the 192.168.1.0/24 subnet. Going to 192.168.1.1 should present you with the pfSense login screen.
Go right ahead and login.
Your WAP now has an IP addressed assigned to it by the DHCP server. If you check the DHCP leases page, it should be the IP that was explicitly set in the AP when you configured it.
We can configure this static mapping in pfSense as well. Next to the entry for your WAP should be a small white button with a blue cross in it. Hovering over this will reveal the label “Add static mapping”.
Click this button and the Edit Static Mapping page will appear.
On this screen we are interested the following:
- MAC Address – The value here should be preset with your AP MAC
- IP Address – This should be pre-filled with the value from your AP
- Hostname – If one was assigned by your AP it will appear here
- Description – Feel free to add a brief description of what this device is e.g. WAP for LAN
After adding the Description Save you changes.
As with an 802.3 Ethernet device such as your laptop’s NIC, the AP has a 48-bit MAC address as we saw above. The AP’s MAC is also used as the BSSID i.e. Basic Service Set ID. This is the non-user friendly ID of the wireless network you mapped the SSID name to.
The MAC (located in the Data Link Layer) for your wireless devices cannot leverage something called CSMA/CD which is used by wired Ethernet. CSMA/CD stands for Carrier-Sense Multiple Access with Collision Detection.
CSMA/CD basically senses if there is traffic on the wire and uses a process (including a waiting period) to decide when to attempt to send/resend a packet.
Our AP and wireless devices thus use a variation on this technique called CSMA/CA where CA stands for collision avoidance. We can aid the quality of our wireless network therefore by choosing which channel our AP broadcasts on and thus reduce the chances of a collision.
Open another tab in your browser or the controller for UniFI. For example http://192.168.1.101
Once logged in navigate to the options where you can set the AP channel. You may have to explore the menus to find this. Regardless if you are using dd-wrt or not, their website provides a handy guide to how channels work here.
The following site lists tools and techniques for checking what the WAP’s near you are using with regards to channels. We are going to use a tool like this to find a potentially less busy channel to run our WiFI connection over.
If you are using a Mac, this scanning tool is built in. Holding down the Option key and clicking the WiFi icon, will display a menu option called Open Wireless Diagnostics.
You can ignore the Wizard that appears and then from the Wireless Diagnostics menu that is displayed at the top of the screen select Window > Scan.
This will bring up a window with a list of Networks, BSSID’s Security protocols, Wireless Protocol i.e. 802.11a/n or 801.11b/g/n etc. RSSI, Noise, Channel, Band, Width and Country.
If you are using a third party tool on Windows or Linux, load it up and explore which channels are less used.
For 2.4 GHz WiFi channels 1, 6 and 11 are the most commonly used as these channels do not overlap with each other.
Based upon this you can choose a channel for your AP to run over that is unlikely to experience as much noise.
Once/if you change the channel, save the changes and reboot your AP.
You should now be able to hook devices up to the AP and receive and IP and Internet connection via pfSense. If you want to check which devices are now using the AP, remember you can always look at the DHCP leases status in pfSense.
Wrapping up
In this blog post we saw how to:
- Hook up a wireless access point to pfSense,
- Configure the WAP to use a static IP
- Disable the WAP DHCP server so pfSense assigns the IP address to clients
- Change the channel on the WAP
- Learned a little bit of theory around 802.11, ARP and MAC addresses
Now we have the basics in place we can explore setting up VLANs and thus segment our home network in order to group devices.
For the next article you will need a VLAN compatible switch such as a PowerConnect 2808 and another WAP.